As the demand for network access grows, laying Ethernet cables in renovated houses has become an important task. This article will explore relevant installation tips and precautions. We first analyze the structural characteristics of the house and the owner’s requirements, and evaluate the considerations that affect the cabling.
Next, we introduce the method of using hidden cabling such as slotting/perforation in the wall, and share the operation experience of professional construction workers. Then, we discuss the advantages of wiring inside the ceiling and provide specific operation guidelines. Finally, we analyze the application scenarios of wiring solutions such as exposed pipe troughs and introduce related solutions.
Considerations for laying Ethernet cables in renovated houses
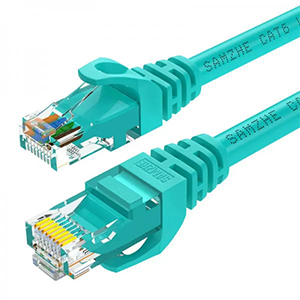
When laying Ethernet cables in renovated houses, factors to consider include the laying method of cables (such as along the wall or under the floor), the available space and channels, and compatibility with existing decoration. It is also necessary to evaluate network needs and choose the appropriate cable type (such as Cat6 or Cat7).
When laying Ethernet cables in a renovated house, the following key factors need to be considered comprehensively:
1. The impact of the house structure on wiring:
(1) Wall material:
- If the wall is made of solid brick, gypsum board or other materials, it is relatively easy to cut grooves in the wall for wiring.
- Wooden frame walls can be laid along the wall surface or in a cable trough channel.
(2) Ceiling design:
- If the room has a ceiling design, you can consider using the ceiling space to lay Ethernet cables.
- This can hide the cables and avoid damage to the wall.
(3) Floor structure:
- For solid wood or tile floors, wiring can be done by cutting grooves along the baseboards.
- When wooden floors are used, wiring can also be done through the space under the floor.
In short, a full understanding of the architectural structure characteristics of the house will help to choose a suitable wiring scheme and minimize the damage to the decoration.
2. Owners’ requirements for aesthetics and minimal damage:
(1) Aesthetics requirements:
- Owners usually hope that the wiring can be neat and beautiful, and try not to affect the indoor environment.
- A hidden wiring scheme can be used, such as using cable troughs, ceilings, etc. to hide cables.
(2) Minimum damage requirement:
- The owner does not want the house to be subjected to too many destructive changes after renovation.
- Therefore, large-scale wall and floor openings and other destructive operations should be avoided as much as possible.
- You can choose to lay cables along existing channels or surfaces.
Taking all the above factors into consideration, laying Ethernet cables in a renovated house requires weighing various requirements. Under the premise of ensuring functionality, a wiring solution that is beautiful, neat and minimally destructive should be adopted as much as possible. This requires full communication with the owner to understand their specific requirements.
Methods for laying Ethernet cables in walls
The methods for laying Ethernet cables in walls include: First, select the appropriate cable type (such as Cat6 or Cat7) to ensure that it meets network requirements. Second, use pipes or cable ducts in the wall to hide the cables to reduce damage to the wall structure. Then, mark and drill holes to allow them to pass through the wall smoothly.
In renovated houses, using hidden wiring in the wall is a common method for laying Ethernet cables. It mainly includes the following technologies:
Slotting wiring:
- Open a narrow slot on the wall surface and embed the Ethernet cable into it.
- You can use an electric hammer or special tools to do the slotting.
- Be careful to avoid damaging the wire pipes, water pipes and other pipeline facilities inside the wall.
Perforated wiring:
- Drill a threading hole in the wall and pass the Ethernet cable through the wall.
- The hole size should be slightly larger than the cable diameter to facilitate threading.
- Also need to be careful to avoid accidental damage to the pipeline.
Pre-buried pipelines:
- During the decoration construction stage, special cable ducts can be buried in the wall in advance.
- In this way, you only need to insert the cables into the ducts during subsequent wiring.
- Pre-buried pipelines can minimize damage to the wall.
Professional construction workers usually follow the following experience and precautions when wiring in the wall:
1. Carefully survey the wall structure and determine the route and construction point in advance.
2. Use tools such as pipeline detectors to ensure that hidden pipelines are not damaged.
3. Fully protect the wall decoration and minimize the size of the grooves or holes.
4. Keep the cable routing neat and beautiful, and use auxiliary materials such as cable ducts.
5. After the construction is completed, repair and beautify the grooves or holes.
In short, hidden wiring in the wall requires professional construction technology and rich on-site experience, which must not only ensure the functionality of cable routing, but also minimize damage to interior decoration.
How to lay Ethernet cables in the ceiling
How to lay Ethernet cables in the ceiling includes: First, choose the appropriate cable type, such as Cat6 or Cat7, to meet the speed requirements. Then, use ceiling brackets or cable ducts to fix the cables to ensure neatness and beauty. Next, plan the cable path to avoid parallelism with power cables to reduce interference.
In a renovated house, using the ceiling space to lay Ethernet cables has the following advantages:
1. Easy to install:
- The ceiling usually has a large space to accommodate cables.
- Cables can be laid and connected through the access port above the ceiling.
2. Beautiful and hidden:
- Hidden cables inside the ceiling can avoid affecting the beauty of interior decoration.
- Only a few small holes are reserved on the ceiling to lead the cables to the device location.
3. Protect cables:
- The ceiling space is relatively closed, which can better protect the cables from damage.
- Avoids the risk of damage that may be encountered in wiring inside the wall.
Specific operation instructions are as follows:
1. Confirm the ceiling structure:
- Understand the material, structure and installation method of the ceiling to determine the cable routing path.
- For metal keels or grid ceilings, you can use their gaps to thread the wires.
2. Cable fixing method:
- Plastic wire clips, metal clamps, etc. can be used to fix the cables above the ceiling.
- Ensure that the cables are laid neatly and beautifully, and will not droop and affect the beauty of the ceiling.
3. Lead out the cables:
- At the location where the equipment needs to be connected, reserve a small hole on the ceiling to lead out the cables.
- The hole size should be slightly larger than the cable diameter to facilitate the threading and leading out.
4. Cable management:
- For multiple cables, you can use bundling or wiring troughs to organize them.
- Ensure that the cable layout is neat and orderly, and does not cause cable entanglement or clutter.
In short, using the ceiling space to lay Ethernet cables in a renovated house is a simple and elegant solution. However, it is still necessary to be cautious when implementing it, and pay attention to the fixing and beautification of the cables.
Using exposed wiring solutions such as pipeline troughs
When using exposed wiring solutions such as pipeline troughs, you should first choose the right materials and sizes to ensure that the cables can be arranged neatly and safely. During installation, fix the pipeline trough on the wall or ceiling to avoid damaging the cables with sharp objects. The wiring should be logical, avoid crossing, and leave appropriate space at the corners to prevent signal attenuation.
In some cases, it is not possible to use hidden wiring in the wall or ceiling. At this time, you can consider using exposed pipe ducts or wire ducts and other wiring solutions. This exposed wiring solution is suitable for the following scenarios:
1. Scenarios that cannot be hidden:
- For example, the house structure cannot accommodate hidden wiring, or the owner does not want to destroy the decoration.
- Environments such as historical buildings and old houses that cannot be renovated on a large scale.
2. Decoration style requirements:
- For some modern industrial style or loft style decorations, exposed pipes are more coordinated.
- The owner has a special preference for this and hopes to highlight the aesthetic effect of the cable wiring itself.
For the needs of exposed wiring, the following solutions can be adopted:
1. Cable duct:
- Use cable ducts made of plastic or metal.
- It can be laid along the wall, footing and other locations to form a neat cable routing.
- The cable duct is available in a variety of colors to coordinate with the interior decoration style.
2. Wire duct:
- Use special cable ducts to neatly arrange the cables.
- Wire ducts are usually attached to the wall or ceiling to form an integrated wiring solution.
- Wire ducts are also available in a variety of materials and shapes.
3. Hook-type wiring:
- Install metal hooks on the wall or ceiling and hang the cables on them.
- This method is more flexible and simple, but the cable status needs to be checked regularly.
No matter which exposed wiring solution is adopted, you need to pay attention to the following points:
- Choose high-quality, beautiful and generous pipeline ducts or cable duct products.
- Ensure that the cables are neatly laid out and the wiring direction is coordinated with the interior decoration.
- Take necessary protective measures to prevent the cables from being damaged or accidentally pulled.
Through the rational use of pipeline ducts, cable ducts and other solutions, even if the wiring cannot be hidden, the exposed wiring can be neat and beautiful.
Overview
The installation of Ethernet cables in a renovated house needs to be adapted to local conditions and take into account both aesthetics and functionality. Our company is a well-known network infrastructure supplier in the industry and has long been committed to providing comprehensive cabling solutions. We have rich on-site construction experience and can tailor the best solution for you.
We provide a variety of cables, pipeline ducts and other supporting products to ensure that you can get high-quality installation services and products. At the same time, our team of engineers will provide professional guidance throughout the process to ensure that the deployed network cabling solution can meet your actual needs to the greatest extent. Contact us now to learn more.
Laying Ethernet Cables in Finished Houses FAQ
Yes, it’s possible to run Ethernet cable in a finished house, but it may require careful planning and some tools.
Common tools include a drill, fish tape, drywall saw, and cable staples or clips.
Identify the most direct route from your router to the desired outlet location, avoiding obstacles like plumbing and electrical wires.
Yes, use cables rated for in-wall installation (e.g., CM, CL2, or CL3) to meet safety codes.
Use a drill with a suitable bit to create holes in walls or floors, ensuring you avoid electrical wiring and pipes.
Use fish tape to guide the Ethernet cable through walls, ceilings, or floors for a clean installation.
Yes, you can run cable along baseboards or use surface-mounted raceways for a neater appearance.
Use a keystone jack or wall plate, following the T568A or T568B wiring standard for proper termination.
Yes, check with local building codes to ensure compliance with electrical and safety standards.
If you hit obstacles, consider alternative routes, or consult a professional for guidance on safe installation.