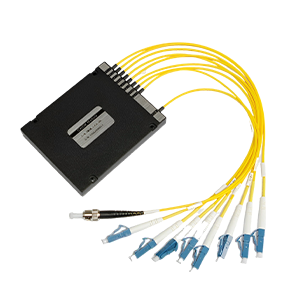
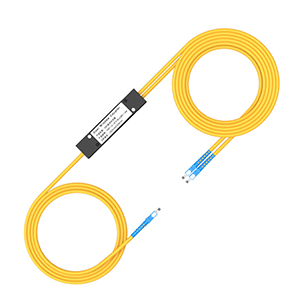
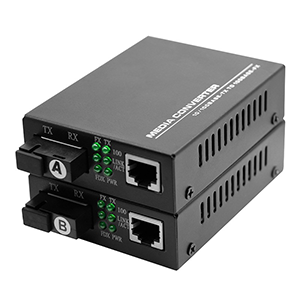
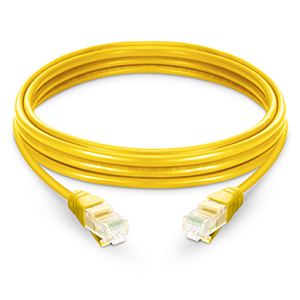
Hello everyone, I am kun, an optical engineer at Gracyfiber. Today I will bring you a blog about fiber optic patch cords. As an important part of modern communication technology, fiber optic patch cord connections play a key role in various fields.
Correct fiber optic connections can ensure high-speed, stable data transmission and provide a reliable communication environment. In this blog post, I will introduce the basic principles and steps of connecting fiber optic patch cables and highlight the importance and impact of correct connections.
Brief description of fiber optic patch cord connection
The connection of fiber optic jumper cables is the process of establishing a physical connection between optical fibers and equipment. The connection method includes inserting the optical fiber into the connector and fixing it to ensure stable signal transmission between the optical fiber and the device. Correct fiber optic connections can ensure the quality and reliability of signal transmission and avoid signal attenuation and distortion.
Correctly connecting fiber optic patch cords is critical to the performance, reliability, and stability of your fiber optic network. It directly affects data transmission quality, network performance and the reliability of the entire system. When making fiber patch cord connections, make sure you are prepared, done correctly, and follow best practices to ensure the best connection quality and network performance.
Preparations for connecting optical fiber patch cords
-
Determine your connectivity needs: First, identify the devices and network topology you want to connect to. Determine the start and destination points of the connection and learn information such as fiber type, length and connector type required.
-
Choose the appropriate fiber optic jumper: Choose the appropriate fiber optic jumper according to your connection needs. Consider factors such as fiber type (single-mode or multi-mode), length, and connector type. Make sure the fiber patch cord you select matches your equipment and network requirements.
-
Check the integrity of the fiber jumper: Before using the fiber jumper, carefully check the appearance of the fiber jumper and the status of the connector. Make sure there are no damages, scratches or bends that could affect the quality of the connection.
-
Prepare cleaning tools: It is important to keep connectors and connection ports clean. Prepare some cleaning tools, such as a static-free cloth, cleaning fluid, or a specialized fiber optic connector cleaning kit, to remove dirt and impurities from connectors and connection ports.
-
Clean the connection ports: Always clean the connection ports before inserting the fiber optic patch cords. Use the cleaning tool to gently wipe the connection port to ensure it is clean, dust-free, and fingerprint-free. This helps ensure good optical contact and transmission quality.
-
Make sure the connectors are oriented correctly: The connectors of fiber optic patch cords usually have a specific orientation. During the connection process, ensure that the connector is oriented correctly and that the connection port is properly aligned. Do not use excessive force and gently insert the connector into the connection port.
-
Position and secure the cable: Once the connector is inserted into the connection port, make sure the cable is positioned correctly and secure. Avoid excessive bending or pulling on the cable to avoid damage to the connector and fiber.
By being prepared and following correct operating procedures, you can ensure the reliability and performance of your fiber patch cord connections. If you are unfamiliar or lack relevant experience, it is recommended to consult professional network engineers or technicians for help and guidance.
Determine fiber optic connector type
There are several ways to determine the type of fiber optic connector:
-
Check the device specifications and documentation: Checking the specifications and documentation of the device you are using will usually clearly state the type of fiber optic connector the device requires. This information can be found in the device’s user manual, technical specification sheet, or on the manufacturer’s official website.
-
Observe the existing connector: If you already have a connected fiber optic patch cord or fiber optic cable, you can determine the connector type by observing the shape and structure of its connecting head. Common fiber optic connector types include SC, LC, ST, FC, etc., each of which has its own unique appearance characteristics.
-
Consult the supplier or manufacturer: If you are still unsure about the type of fiber optic connector, you can contact the supplier or manufacturer of the device for consultation. They can often provide technical support and guidance to help you identify the correct connector type.
-
Use connector identification tools: There are specialized tools and equipment that can be used to identify fiber optic connector types. For example, the Fiber Connector Identifier can determine the type of connector by touching and comparing it. These tools typically have easy-to-use interfaces that can help you quickly and accurately identify connector types.
It is important to note that different devices and applications may require different types of fiber optic connectors. Make sure to choose the correct connector type to ensure compatibility and reliability of the connection. If you are unsure or unfamiliar with the types and uses of fiber optic connectors, it is best to consult a professional network engineer or technician for help and guidance.
Fiber patch cord connection steps
The following are the general steps for connecting fiber patch cords:
-
Determine the connection: Determine the starting point and destination point to be connected, and check whether the connector type and fiber type match.
-
Clean connectors and connection ports: Use appropriate cleaning tools (such as non-static cloths and cleaning fluids) to clean the surfaces of fiber optic connectors and connection ports to ensure they are clean, dust-free, and free of dirt.
-
Check the connector: Check whether the fiber optic connector is intact and not damaged or bent. Make sure the connector is oriented correctly and check that the connector pins or sockets are clean and free of scratches.
-
Insert the connector: Gently insert the fiber optic connector into the connection port, ensuring proper alignment and avoiding using excessive force. Depending on the connector type, it may be necessary to rotate the connector into place.
-
Secure the cable: Once the connector is inserted into the connection port, make sure the cable is in the correct position and secure it using appropriate clamps or fixtures as needed.
-
Check the connection quality: Use an optical power meter, optical time domain reflectometer, or other appropriate test instrument to test the connection. Check parameters such as optical power and reflection loss to ensure good connection quality.
-
Record and label: Record connection details, including connector type, connection port number, and connected device. Use appropriate marking methods, such as labels or color coding, to facilitate future identification and maintenance.
Note that this is just a general connection step. In practice, there may be requirements for specific equipment or networks. Always refer to your device’s user manual, manufacturer’s recommendations, or seek professional advice to ensure proper fiber optic patch cord connections.
Fiber patch cord connection test
Fiber optic connection testing is an important step in verifying connection quality. Commonly used test methods include light source and optical power meter testing, which can detect signal strength and attenuation. Use a fiber optic connection tester to perform the test, and interpret and analyze the test results.
-
Prepare test equipment: Make sure that the test equipment is complete, including two fiber jumpers, equipment connecting the fiber jumper ports (such as fiber optic transceivers or fiber optic switches), and test instruments (such as optical power meters and optical time domain reflectometers).
-
Connect the fiber jumper: Insert one port of one fiber jumper into the fiber jumper connection port of one device, and then plug the other port of the other fiber jumper into the fiber jumper connection port of another device. Make sure the connection is secure and the connection ports are properly aligned.
-
Test the optical power: Use an optical power meter to test the optical power between the two fiber jumpers. Connect the receiving end of the optical power meter to the output port of one fiber jumper, and connect the input port of the fiber jumper to the output port of the other fiber jumper. Record the optical power value displayed by the optical power meter.
-
Test optical time domain reflection: Use an optical time domain reflectometer to test the reflection loss and connection quality of the fiber jumper connection. Connect the transmitting end of the optical time domain reflectometer to the output port of one fiber optic jumper, and connect the receiving end of the optical time domain reflectometer to the input port of another fiber optic jumper. Start the optical time domain reflectometer and record the test results, including reflection loss and connection quality.
-
Analyze the test results: Evaluate the quality and performance of the fiber patch cord connection based on the test results. Check whether the optical power and optical time domain reflection values are within a reasonable range to ensure the reliability and performance of the connection.
It should be noted that fiber optic patch cord connection testing usually requires certain professional knowledge and testing equipment. If you do not have the relevant experience or equipment, please consult a professional network engineer or technician for testing or support.
Notes on fiber optic patch cord connection
When making fiber optic patch cord connections, there are a few things to keep in mind:
-
Make sure the type of fiber optic patch cord matches: There are different types of fiber optic patch cords, such as single-mode fiber optic patch cords and multi-mode fiber optic patch cords. Ensure that the type of fiber optic patch cord selected and used matches the requirements of the network equipment or fiber optic connection port to avoid incompatibility or performance degradation issues.
-
Handle fiber optic patch cords carefully: The fiber optic cores of fiber optic patch cords are very fragile and should be handled with care to avoid bending, twisting or pulling. During the connection process, insert and unplug the fiber patch cord gently and avoid applying excessive force to avoid damaging the fiber.
-
Pay attention to the length of the fiber jumper: There is a certain maximum length limit for the fiber jumper, and different types of fiber jumpers have different transmission distance restrictions. Make sure the length of the selected fiber optic patch cord is suitable for the actual application needs to avoid signal attenuation or transmission quality degradation.
-
Avoid bending radius that is too small: During the wiring and installation process, avoid bending radius that is too small for fiber jumpers. Optical fiber jumpers usually have a minimum bending radius requirement. If the bending is too small, it will cause the dissipation and loss of the optical signal.
-
Make sure the connection port is clean: Before inserting the fiber patch cord, make sure the connection port is clean and clean. Use a pure, non-static cloth or a dedicated cleaning kit to clean the connection port to remove impurities such as dust, dirt or fingerprints to ensure good optical contact and transmission quality.
-
Use appropriate connection methods: According to actual needs and equipment requirements, select appropriate connection methods, such as SC, LC, ST and other connector types. Ensure connector matching and plugging and unplugging reliability.
-
Regular inspection and maintenance: Regularly check the connection status of the fiber jumper to ensure that the connection is firm and not loose. If any damage, breakage, bending or other abnormality is found, it should be replaced or repaired in time.
Please note that if you do not have relevant experience or expertise, it is best to consult a network engineer or technician for fiber optic patch cord connection to ensure a correct and reliable connection.
How to maintain the fiber jumper after it is connected
Once the fiber patch cord connection is completed, proper care and maintenance can ensure the quality and stability of the connection. The following are several important aspects of maintaining fiber optic patch cord connections:
-
Regular cleaning: Clean fiber optic connectors and connection ports regularly to remove impurities such as dirt, dust, and fingerprints. Use a specialized fiber optic connector cleaning kit, a static-free cloth, and cleaning fluid for cleaning. Avoid touching the connector directly with your fingers to prevent fingerprints and grease.
-
Keep Dry: Fiber optic patch cord connections should be kept dry. Avoid liquids entering connectors and connection ports as liquids may cause corrosion and damage. If there is moisture or water droplets at the connection, it should be removed in time and the cause should be checked.
-
Avoid bending and pulling: Avoid excessive bending or pulling on fiber optic patch cord cables. Excessive bending can cause optical signal loss and connector damage. Make sure that the connecting wires are not subjected to unnecessary tension and stress during routing and installation.
-
Prevent physical damage: Avoid physical damage to connectors and connection ports, such as knocks, scratches, or drops. Keep the connector cover intact to prevent dust and debris from entering the connector.
-
Regular inspection and testing: Regularly check the status of fiber optic connections and test the connections using an optical power meter, optical time domain reflectometer, or other appropriate test instruments. Check parameters such as optical power, reflection loss and signal quality to ensure good performance of the connection.
-
Record and label: Record connection details, including connector type, connection port number, and connected device. Mark them with methods such as labels or color coding for future identification and maintenance.
-
Regular maintenance: Carry out regular maintenance work on fiber jumper connections as needed. This may include replacing aging or damaged connectors, adjusting the location or length of connecting cables, etc.
Through regular care and maintenance, the life of the fiber optic patch cord connection can be extended and its performance and reliability can be ensured. If you encounter problems or require more in-depth maintenance, it is recommended to consult a professional or network engineer for help and guidance.
Fiber optic patch cord cable connections are a critical step in establishing a reliable communications environment. By properly connecting and maintaining fiber optics, we can achieve high-speed, stable data transmission that meets modern communications needs. During the connection process, we need to follow correct operating steps, pay attention to details and avoid common connection errors. Regular maintenance and upkeep are also important measures to maintain the good condition and reliability of fiber optic connections.
Fiber Patch Cord FAQ
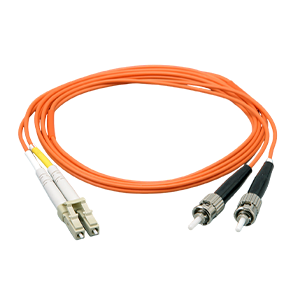
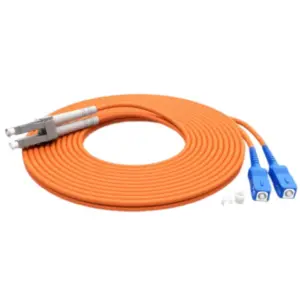
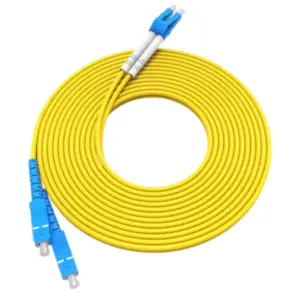
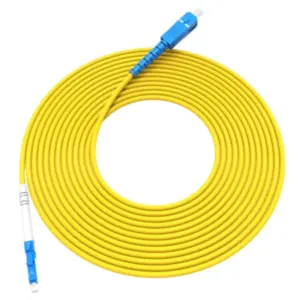
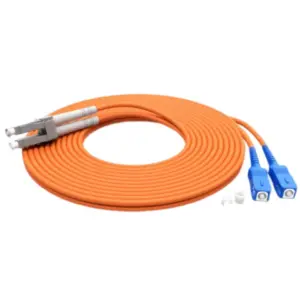
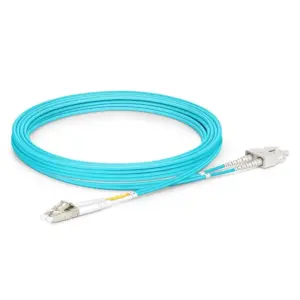
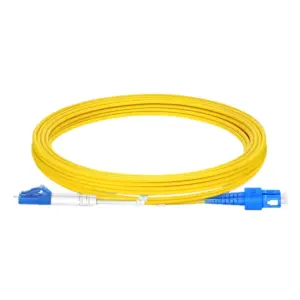
A fiber patch cord, also known as a fiber optic patch cable or fiber jumper, is a cable used to establish a temporary or permanent fiber optic connection between two devices or components. It consists of a fiber optic cable with connectors on both ends, typically SC, LC, or ST connectors, that can be easily plugged into fiber optic ports.
The main purpose of a patch cord is to provide a convenient and flexible way to connect fiber optic devices or components. It allows for quick and easy interconnection between network equipment, such as switches, routers, servers, and fiber optic transceivers. Patch cords are commonly used in data centers, telecommunications networks, and other applications where fiber optic connectivity is required.
The main difference between a fiber patch cord and a pigtail cable lies in their design and usage. A fiber patch cord is a cable with connectors on both ends, designed for direct connection between two devices or components. On the other hand, a pigtail cable has a connector on one end and exposed fibers on the other end. Pigtail cables are typically used for splicing or termination purposes, where the exposed fibers are connected to other fibers or devices using fusion splicing or connectors.
Yes, you can patch fiber cable using fiber patch cords. Patching fiber cables involves connecting the ends of the fiber cables to the corresponding ports on network devices or components using fiber patch cords with compatible connectors. This allows for the establishment of fiber optic links and enables data transmission between devices.
The main difference between fiber cable and a fiber patch cord is their purpose and functionality. Fiber cable, also known as fiber optic cable, refers to the entire cable assembly that consists of one or more fiber strands, protective covering, and strength members. It is used for transmitting light signals over long distances. On the other hand, a fiber patch cord is a specific type of fiber cable that is shorter in length and has connectors on both ends. It is primarily used for interconnecting devices or components over short distances within a network.
Optical fiber refers to the thin strand of glass or plastic used to transmit light signals in a fiber optic cable. It is the core component of a fiber optic communication system. A patch cord, on the other hand, is a cable assembly that includes optical fiber and connectors on both ends. The patch cord is used to establish a temporary or permanent connection between two devices or components.
Attaching a fiber patch cord involves connecting the connectors on both ends of the patch cord to the corresponding ports on network devices or components. The connectors are designed to be inserted into fiber optic ports until they click into place, ensuring a secure and reliable connection. It is important to handle fiber patch cords carefully, avoiding excessive bending or twisting, to prevent damage to the fibers or connectors.
The length of a fiber patch cable can vary depending on the specific application and requirements. Standard fiber patch cables are commonly available in lengths ranging from 1 to 10 meters. However, custom lengths can be ordered to suit specific needs. In some cases, longer fiber patch cables can be used, but it’s important to consider factors such as signal attenuation and signal quality when using longer cable lengths.

